Studio Assistant
Type what you want in the right panel of Studio. The model turns the request into action code, Studio runs the code in the project and lists what was done. Each action is undone in a single step.
Instead of doing tag, alarm or screen work one item at a time, type your request. You can also ask questions. Prerequisites: an open project and an installed AI package.
Opening the panel
- Open the Assistant
Click the Assistant button on the right of the toolbar or follow Tools›Assistant (AI)…. The panel opens on the right. The same button closes the panel.
- Read the state
When the panel header shows Ready, type your request. If the model is still loading, the request waits in line: First opening.
- Type your request
Enter sends, Shift+Enter starts a new line. If you click a sample request, the text is written to the box and is not sent automatically. Replace the names in the samples with the names from your own project.
 12345
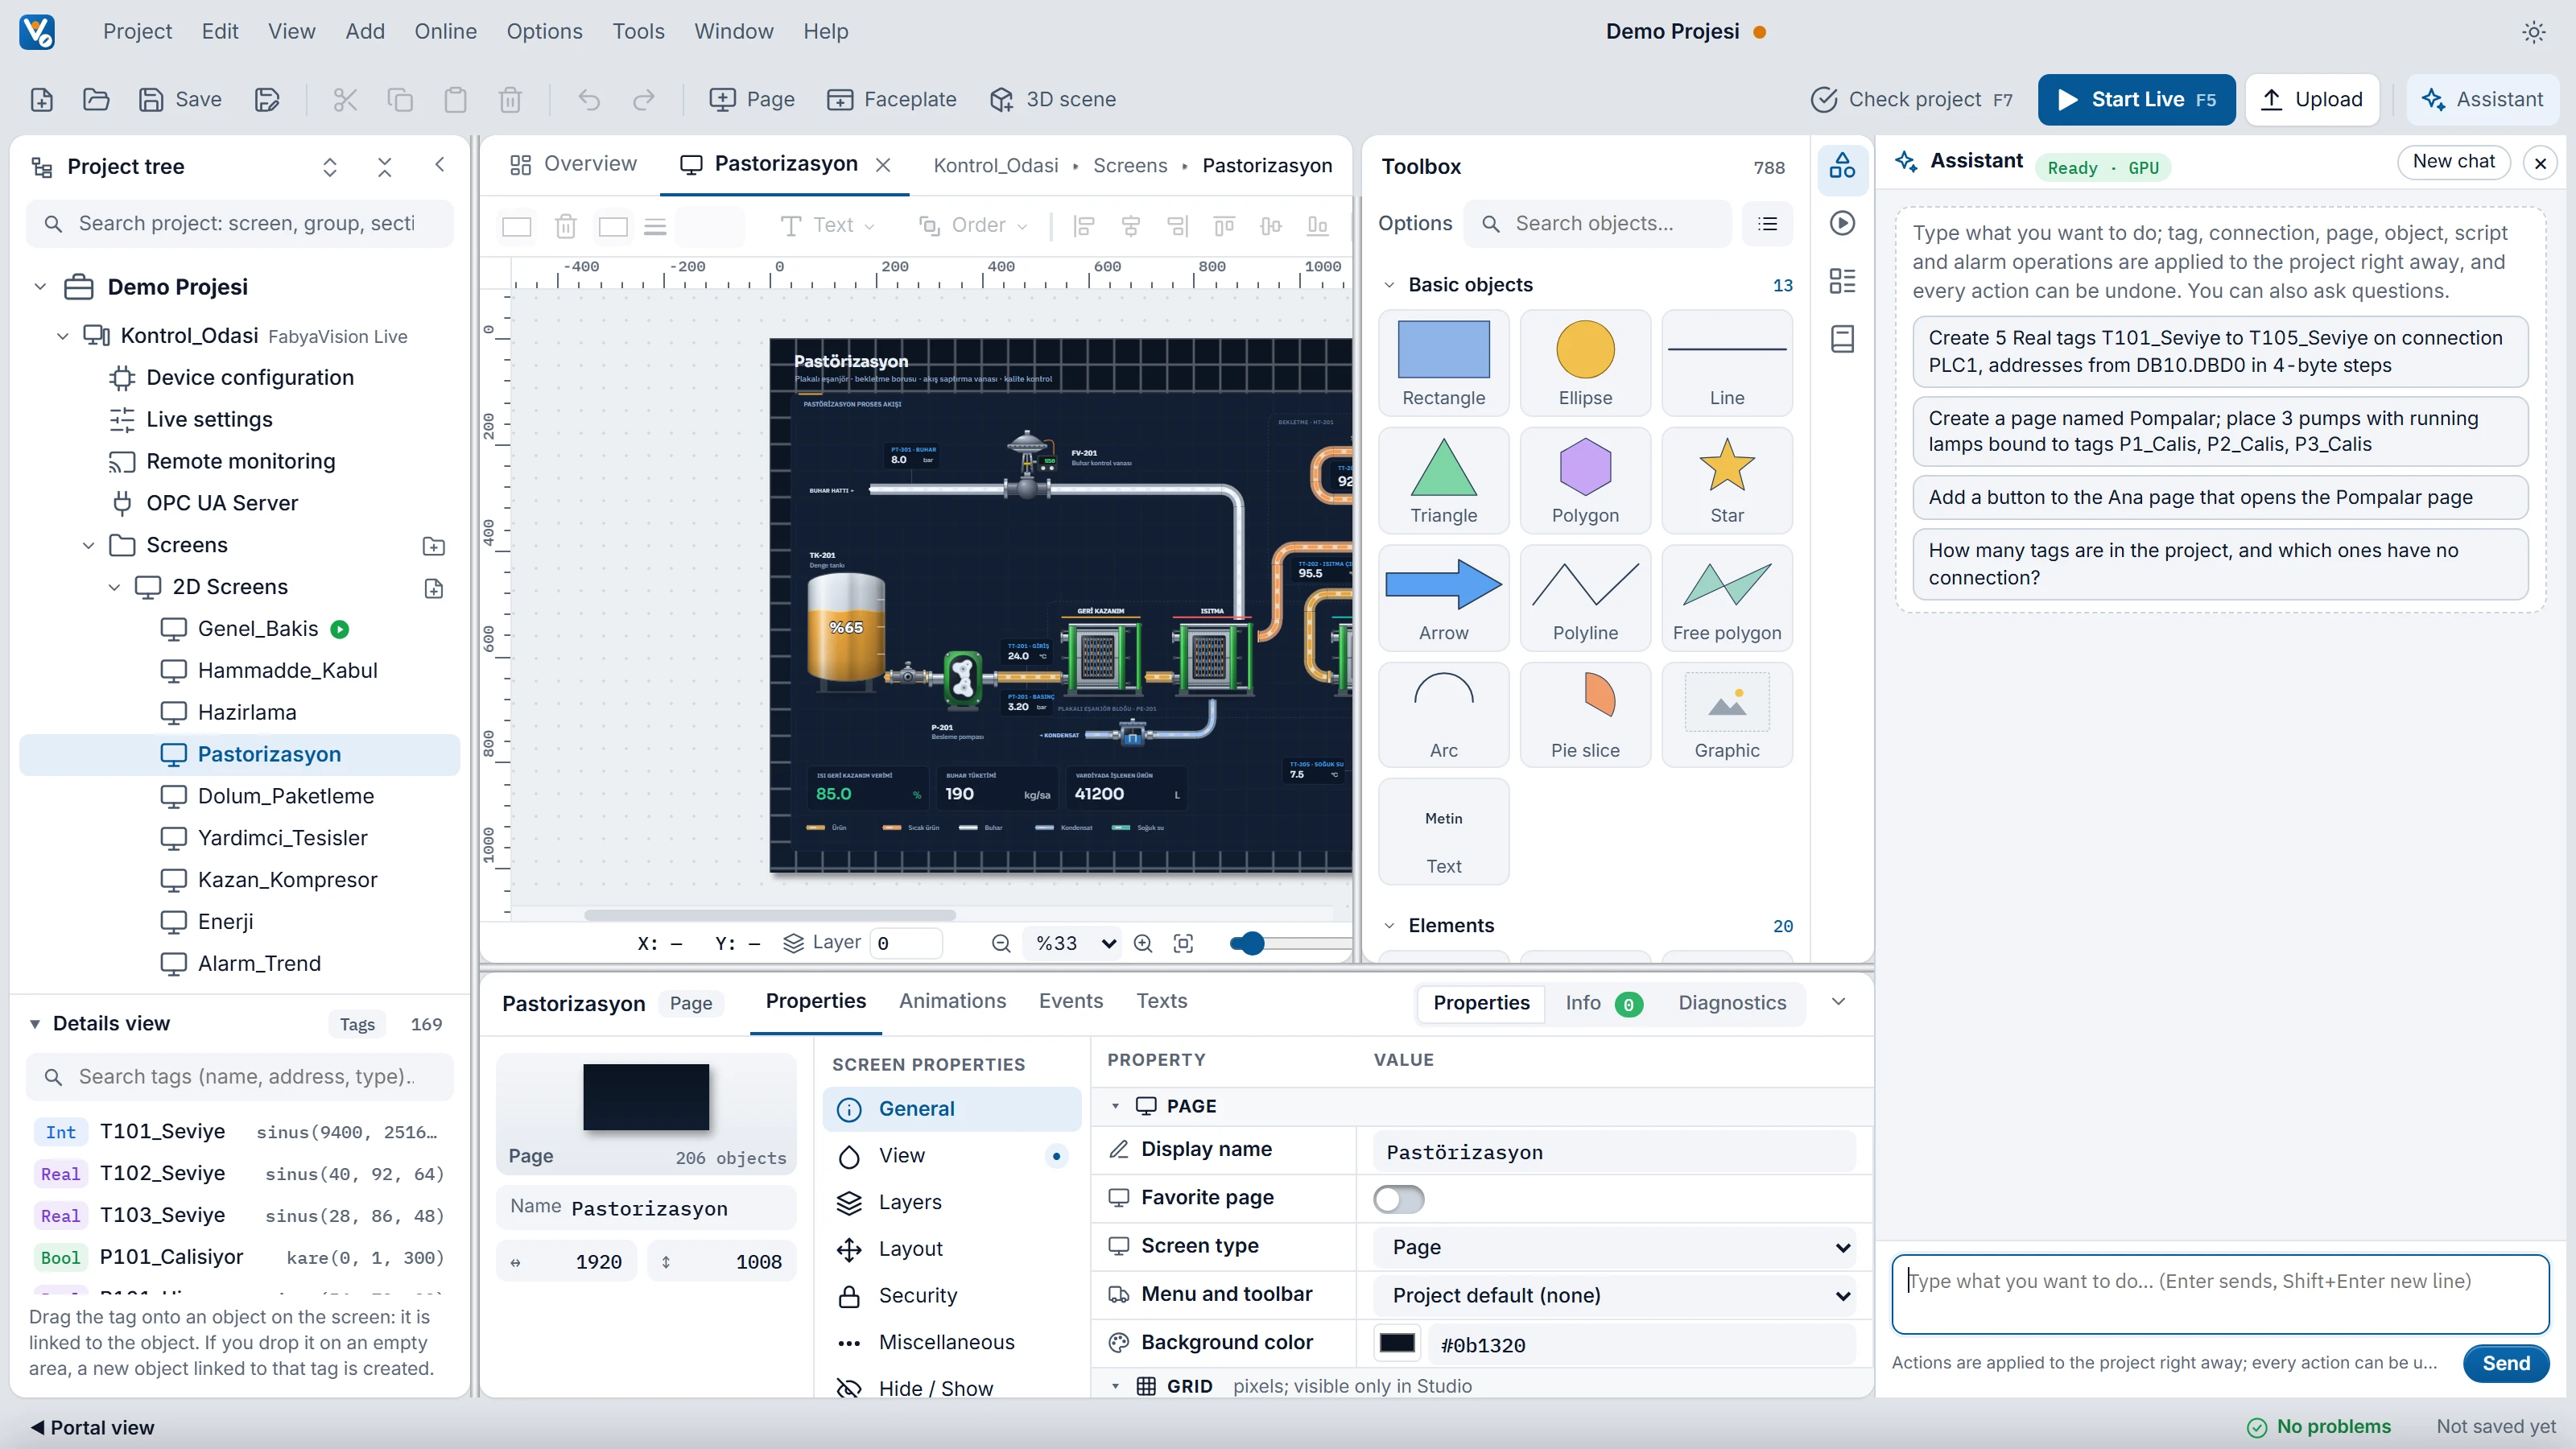
- Assistant — opens and closes the panel.
- State — the state of the model and the hardware it uses.
- New chat — deletes the chat history.
- Sample requests — click one to write it in the request box.
- Request box — Enter sends, Shift+Enter starts a new line.
The New chat button deletes the chat history. The model sees only the last four turns of the earlier conversation, so start a new chat when you change the subject.
What you can have it do
| Operation | Sample request |
|---|---|
| Adding a tag | On the PLC_Proses connection, create 5 Real tags from T201_Seviye to T205_Seviye, with addresses starting at DB40.DBD0 and increasing by 4 bytes, unit % |
| Alarm | Add an analog alarm that warns when T102_Seviye goes above 90, with the text T-102 level high |
| Script and task | Write a VBS script that appends the T102_Seviye and T103_Seviye values to a CSV file as a row every hour on the hour, and set up its task too |
| 2D screens and objects | Open a 1024 × 600 screen named Pompa_Ozet; place a pump and a run lamp for each of P101 and P103, and bind them to the tags P101_Calisiyor and P103_Calisiyor |
| 3D scene | Build a 3D scene named Tank_Ciftligi: 2 tanks side by side, a pump in front of them, connected with pipes |
| Event | Add a button to the Genel_Bakis screen that opens the Pastorizasyon screen |
| Tag binding | Bind the selected lamp to the P103_Ariza tag |
| Bulk change | Make the pipes in the Tesis_3B scene dark gray |
| Layout | Arrange the tanks on this screen in a 2-column grid or Move the buttons down by 40 pixels |
| Pipes | Connect Pompa_1 and Tank_1 with a pipe |
| Setting | Make Genel_Bakis the start screen |
| Panel wizard | Prepare the panel wizard with the pump station starter, with 2 motors with 5.5 kW drives |
| Question | How many tags are in the project, and which ones have no connection? |
Sections it can access
- Tables: Connections, HMI tags, HMI alarms, Scripts, Scheduled tasks, Cycles, the Recipes table, Historical data, Report definitions, Text and graphic lists, User administration, Languages and texts, the Notifications and Performance Reports tables, and the tables inside settings sections.
- Settings forms: Device configuration, Live settings, Remote monitoring, Screen management, OPC UA Server and the general settings of Notifications.
- Screens: adding and naming 2D screens and 3D scenes; adding, changing and deleting objects; events, tag bindings, arranging in a grid, connecting with pipes.
- Panel design wizard: opens the wizard with the settings you want. You click Create yourself: Panel design wizard.
Writing to tables goes through the same validation as import from Excel: unique name, selection values, PLC address format. The model receives the most detailed information for the tag, connection, alarm, script, task and cycle tables. For other tables, keep the request short.
How a request works
- The model writes the answer
The answer arrives piece by piece. To interrupt it, click the Stop button. If you asked a question, the answer arrives as text.
- Studio runs the code
If the answer contains action code, Studio runs it in the project immediately. It does not ask you. The only exception is deletion.
- Read the result
The lines in the Action box are the report from Studio, that is, what was actually done in the project. Do not confuse them with the sentences of the model.
 1234
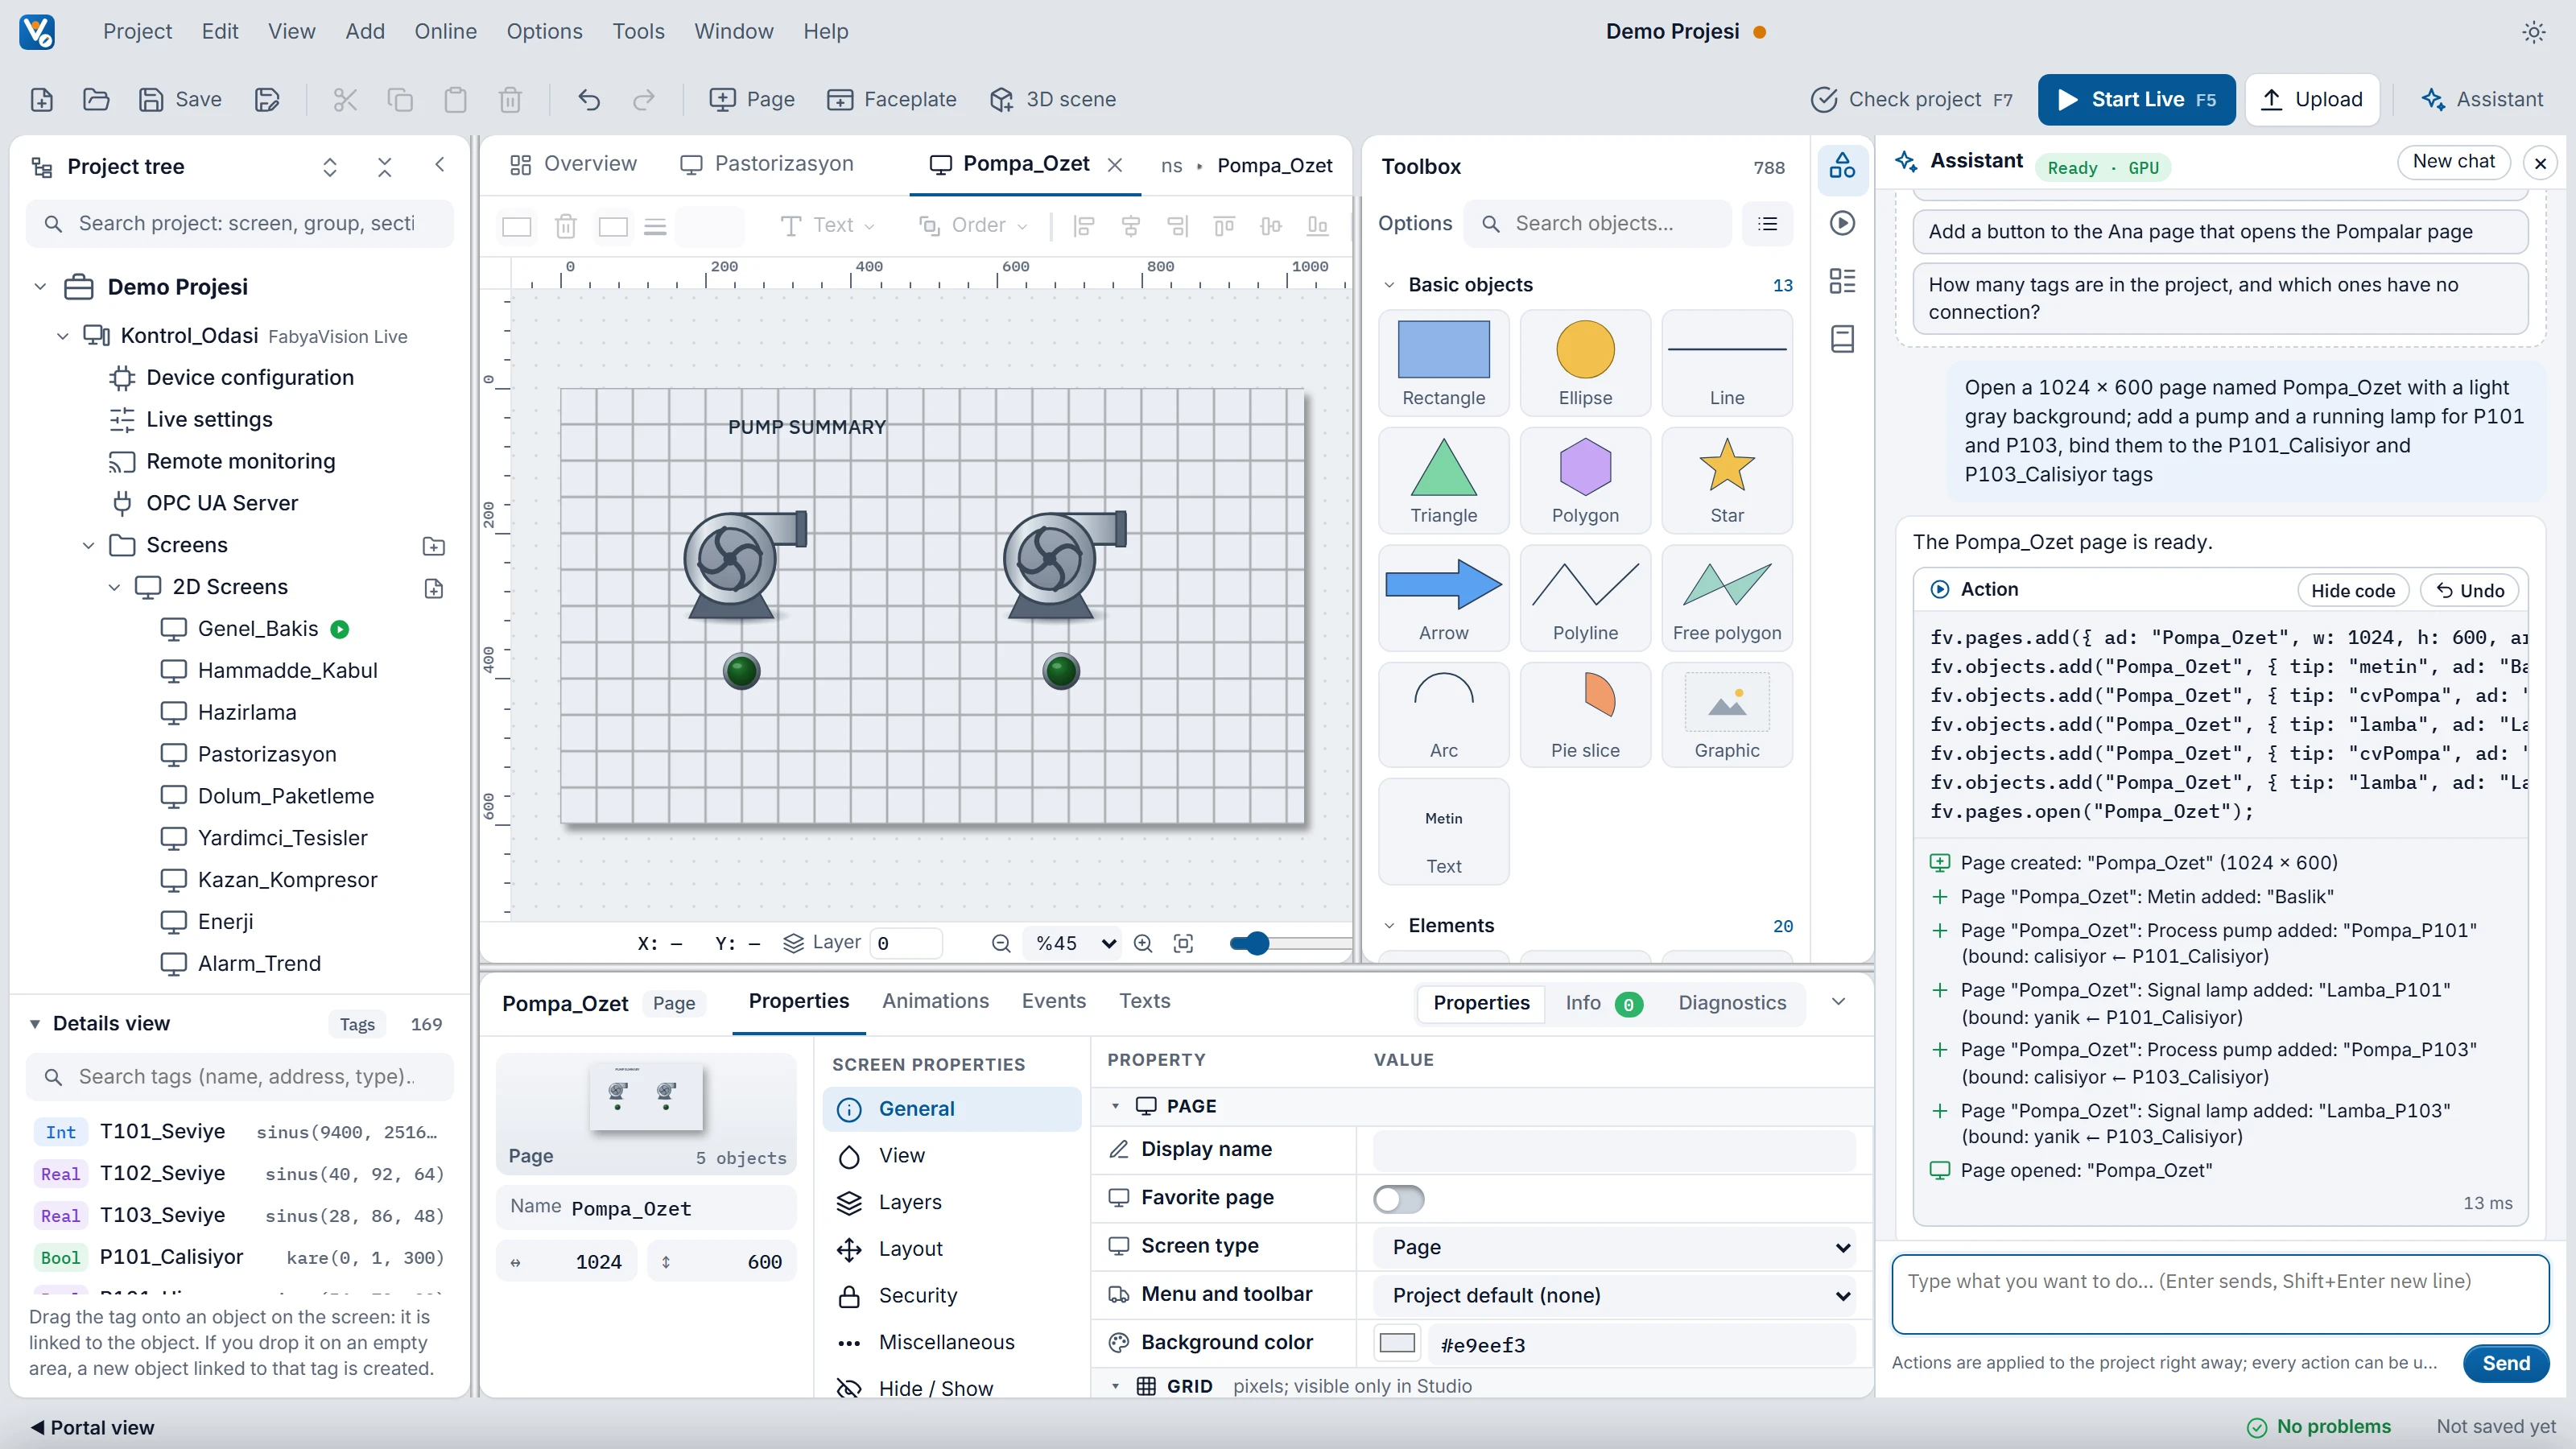
The request ran: a new screen was opened, objects were added and bound to tags. - Action — the code written by the model runs immediately.
- Show code — shows and hides the script being run.
- Undo — undoes this whole action in a single step.
- Result rows — what was actually done in the project.
- Review and save
Review the added rows and objects. Check with Tools›Check project (F7). The Assistant does not save the project; saving is up to you.
Action box
- Show code
- Opens the script that the model generated and Studio ran. You do not need to read it. Look at it if you want to see line by line what was done. Hide code closes it.
- Undo
- Undoes everything the action did in a single step, no matter how many objects were added. Same as Ctrl+Z. The button appears if there are no other changes in the project after the action. If you made other changes, go back step by step with Edit›Undo.
- Result rows
- Added, changed and deleted records. A property bound to a tag is shown in the row. Deletion rows are in the warning color.
- Script code
- If you ask for a script, the code appears in a separate box, for example Script code · VBS. This code is not run; it is saved to the Scripts section.
- Measurement line
- Below the answer, the number of tokens generated by the model, the speed and the duration are shown.
Delete confirmation
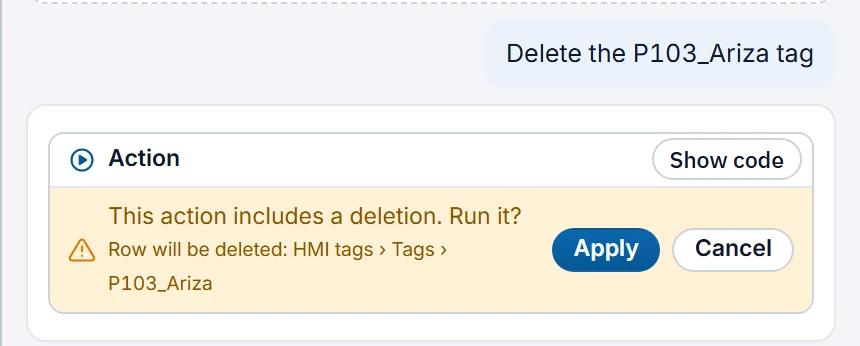
Code that includes deletion asks for confirmation before it runs. The box lists the row, object or screen to be deleted. Read the text and click Apply or Cancel.
 12
- Apply — the code runs.
- Cancel — the code does not run and the project does not change.
Screen deletion has separate protection. If your request does not clearly ask to delete a screen, the screen is not deleted. Examples: … sayfasını sil, delete the … page, remove the … screen. If the names to be deleted are generated by a loop in the code, the box cannot show the names one by one. In this case, inspect them with Show code.
Automatic correction
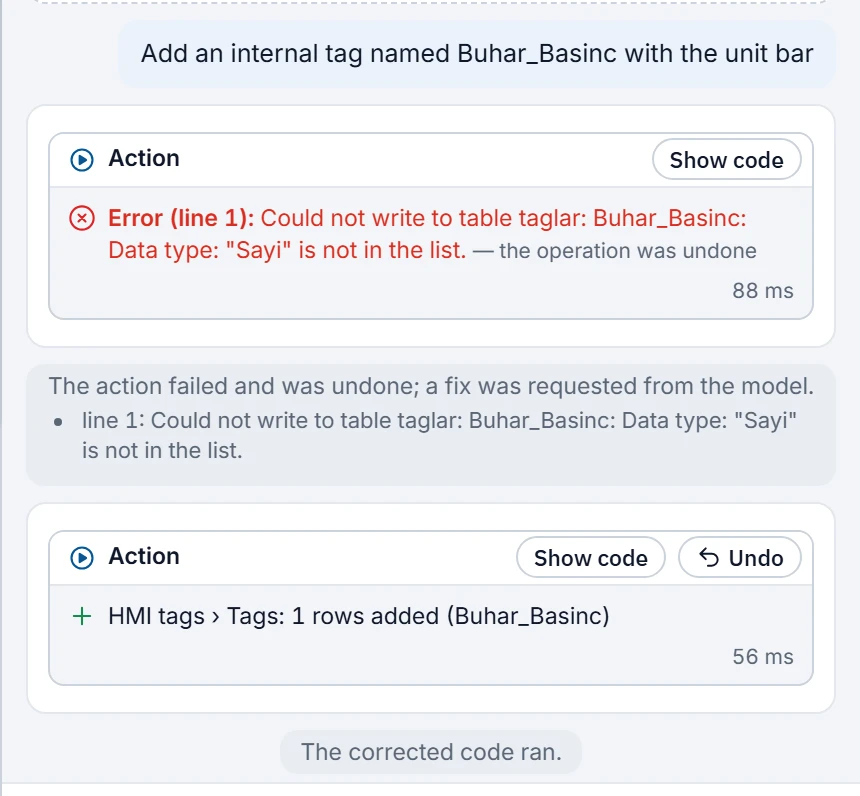
If the code raises an error, Studio undoes everything that operation did, so no partial work remains. It sends the error to the model and asks for corrected code. The corrected code also runs immediately.
| Note in the chat | Meaning |
|---|---|
| The action failed and was undone; a fix was requested from the model. | The first attempt was undone. |
| The corrected code ran. | The work is done. Read the result rows. |
| The corrected code gave a different error; a second (last) fix was requested. | A new error occurred; making the last attempt. |
| The corrected code failed too; nothing was done. | Studio stopped and the project did not change. Make the request smaller and enter it again. |
| The script code was written but not saved to the project; save code was requested from the model. | The model wrote the script but did not save it. |
| The script was saved but no scheduled task was added; the task was requested from the model. | Your request includes scheduling, but the task is incomplete. |
Studio requests a correction at most twice. If the same error recurs, it stops after the first correction.
When a script is saved, its syntax is also checked. Usages that do not work in Live are not saved, for example Excel.Application in VBS, and smtplib or requests in Python. To get data into Excel, ask for a CSV file. Studio corrects some known spelling confusions itself and adds a note to the result.
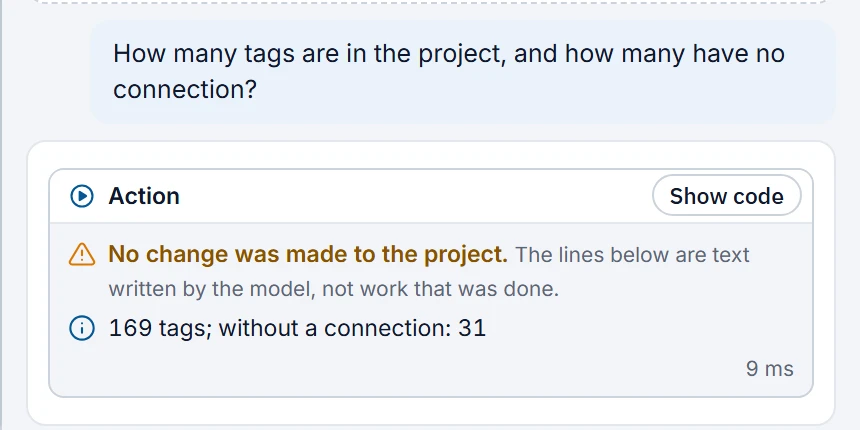
"No change was made to the project" warning
This warning says that the code that ran did not add, change or delete anything in the project.
- This is normal if you asked a question. The lines below it are your answer.
- If you asked for work, the work has not been done. Do not go by the model saying I did it. If it tried to add or change code and there is no result, Studio treats this as an error and asks for a fix.
For good results
- Enter tag, screen and connection names in full. The project summary contains the first 60 tags. If you enter other tags by their full names, Studio passes them to the model as well.
- If you do not enter a screen name, the open screen is used. For a 3D scene, write 3D in the request.
- If you want a script, state the language: VBS, Python, JavaScript or in C.
- Split a large job into parts. Each request becomes a separate undo step. Very long answers may be cut off.
- If you do not specify a position, Studio places the object in an empty spot on the screen.